How-to-Guide
How to use Project Planner! in Microsoft Teams
A step-by-step walkthrough for installing the app, creating projects, tasks, subtasks, milestones, and adding team members.
6 sections · ~5 min read
For Microsoft Teams users
Getting Started
Install the app and set up your first project plan in Microsoft Teams.
Click Add to bring Project Planner! into Teams
Open the Microsoft Teams app store, find Project Planner! and click the Add button on its listing. This launches the Teams add-app flow and takes you directly into the setup experience.
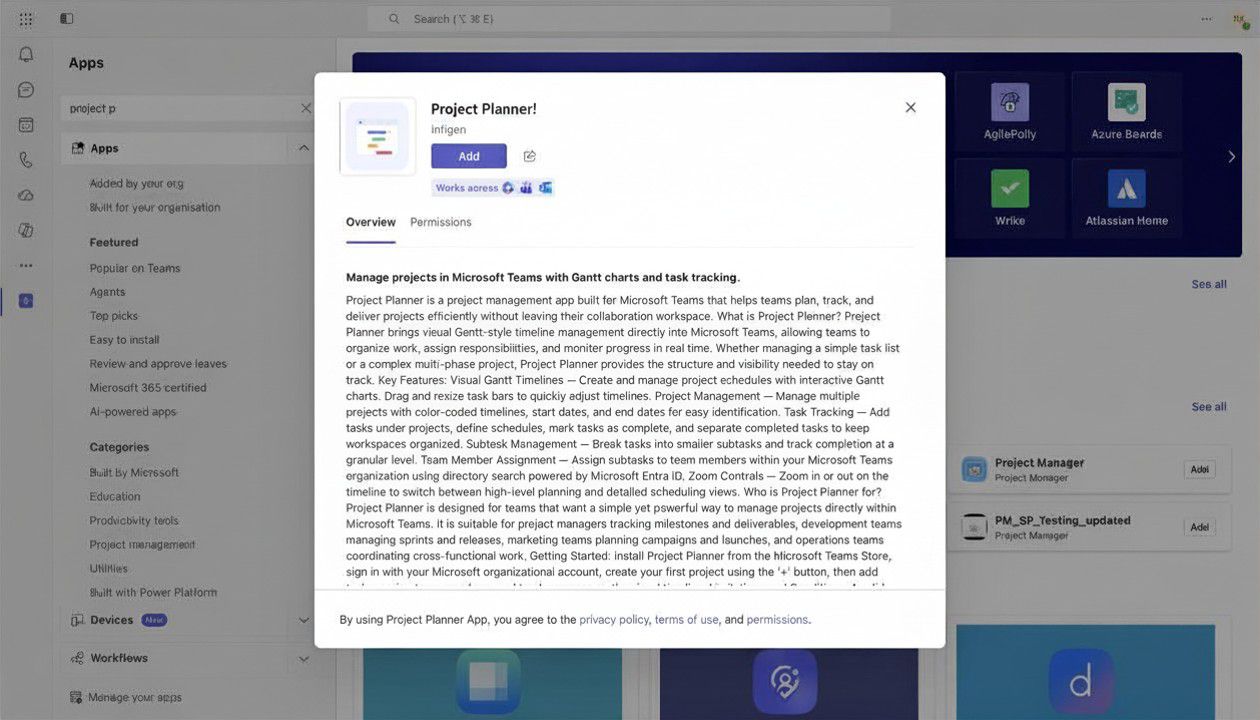
Project Planner! in the Microsoft Teams app store
Select a channel or chat, then click Go
After clicking Add, a dialog appears asking "How would you like to use this app today?". Select a channel or chat where you want Project Planner! to live, then click Go to confirm.
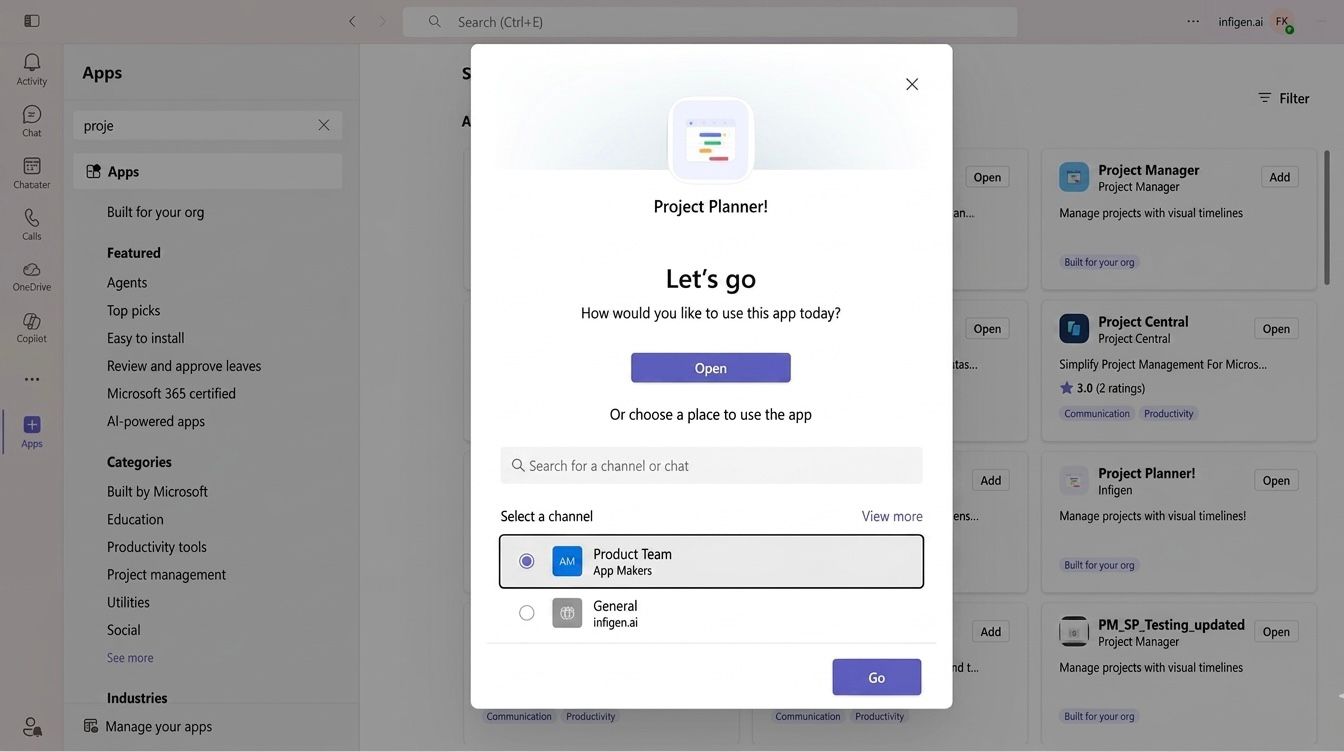
Pick the channel where the planner will live
Add another plan to the same channel
Want a second planner in the same channel? Press the + (plus) button in the channel's tab bar to add a new tab, then add Project Planner! again. Each tab holds a completely independent planner.
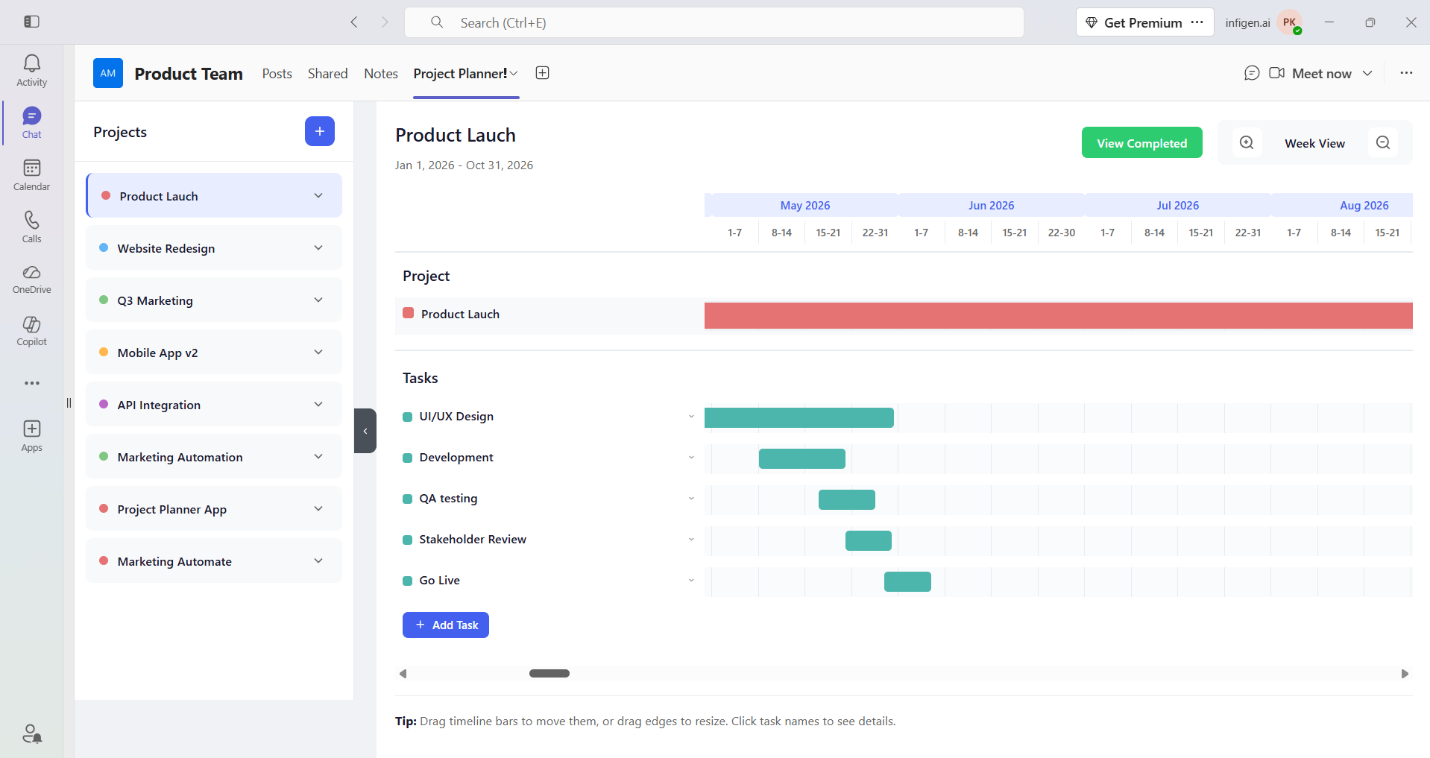
Use the channel tab + button to add another plan
Press the + button under Projects to add a new one
Once inside the Project Planner! tab, you'll see a Projects sidebar on the left. Click the + (plus) button at the top-right of that sidebar to start creating a new project.
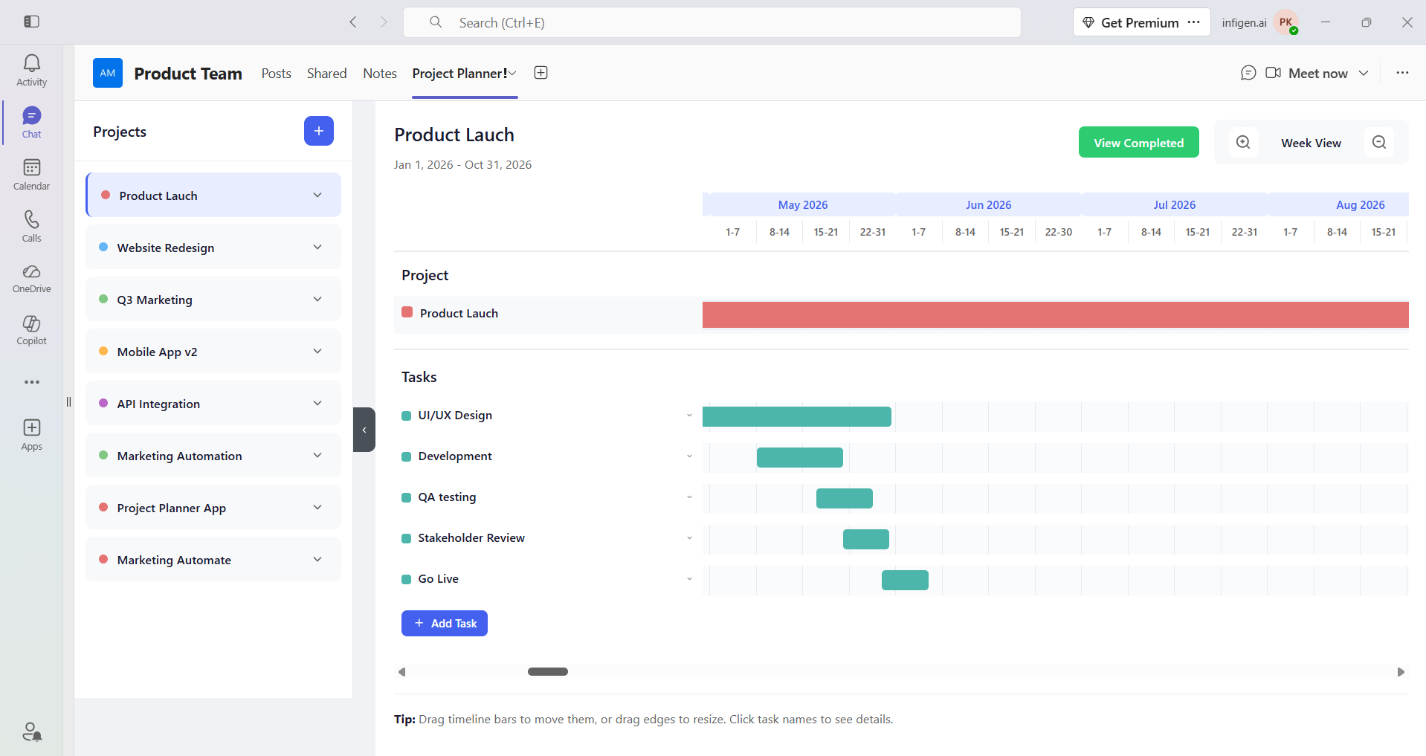
The + button in the Projects sidebar
Select Add Project to create and save it
Clicking + opens the Add New Project dialog. Fill in the project name, pick a colour, and set start and end dates. When you're ready, click Add Project to save — it appears immediately in the sidebar and on the timeline.
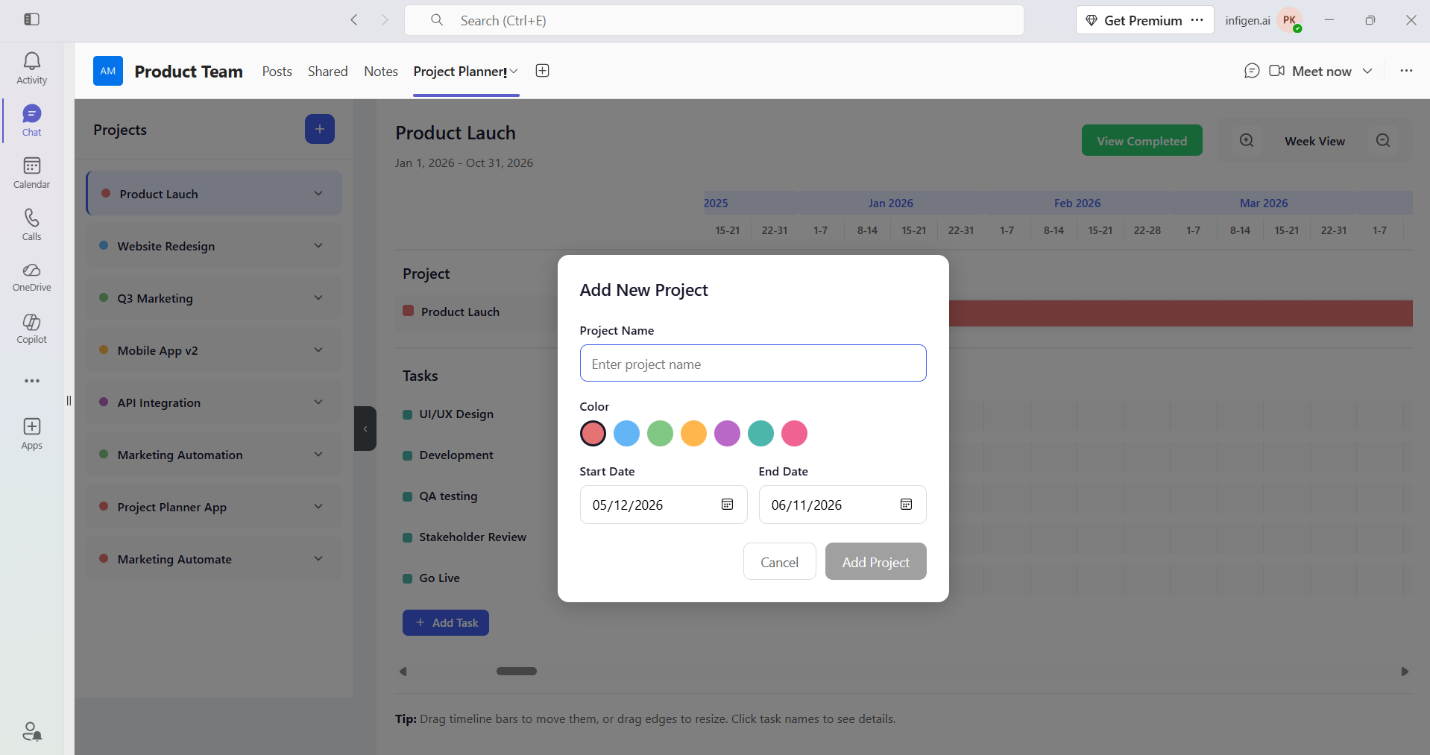
Confirm with the Add Project button
Adding Team Members
Invite colleagues and assign work to your team.
Assign subtasks to team members
Each subtask can be assigned to a team member in your organisation. When you expand a task by clicking its chevron (⌄), you'll see the SUBTASKS panel. Each subtask shows an assignee badge (e.g. "Pavan", "Thiru") on the right side. To assign or reassign, click the assignee badge — a tooltip shows "Assigned to [Name] — Click to reassign". You can also assign when creating a new subtask. The assignee receives an email notification so they know what's expected.
How it works:
1. Click the chevron (⌄) next to a task name (e.g. "Stakeholder Review") to expand it.
2. In the SUBTASKS section, you'll see existing subtasks with checkboxes, edit/delete icons, and an assignee badge.
3. Click the assignee badge to reassign, or type a new subtask in the "Add subtask…" input field and click the + button to create one.
4. Select a team member from your organisation to assign the subtask to them.
Tasks & Subtasks
Break down your project into manageable pieces of work.
Click Add Task to create tasks inside a project
With a project selected, click the + Add Task button on the timeline view. A pop-up appears where you can enter the task name, pick a colour, and set the start and end dates. Click Add Task to save.
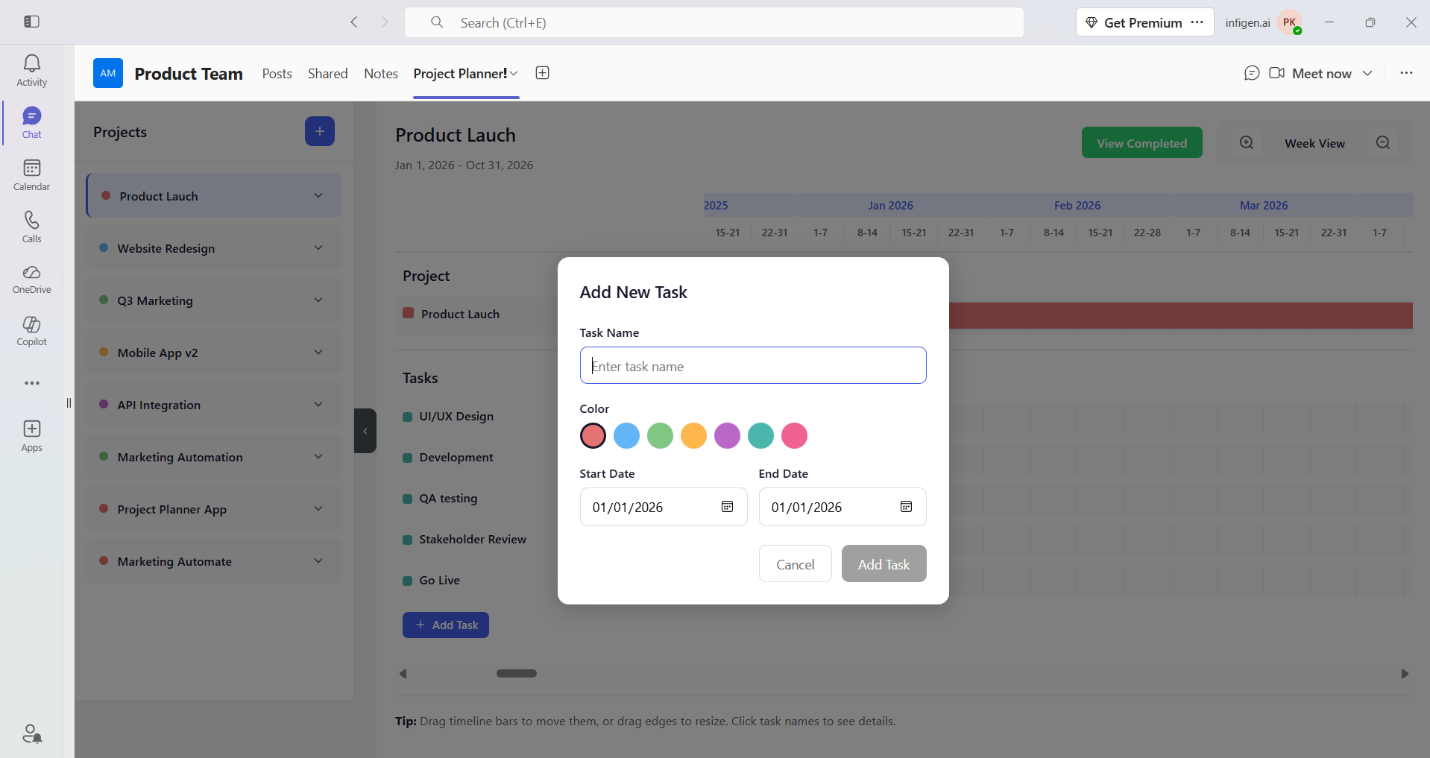
Add Task lives in two places — sidebar and dialog
Add subtasks to break down work further
Click on any task name (e.g. "Stakeholder Review") or the chevron (⌄) to expand it. The task panel shows the task's date range (e.g. May 21 — May 31, 2026), a Done checkbox to mark it complete, and the SUBTASKS section below.
To add a subtask, type a name in the "Add subtask…" input field at the bottom and click the + (plus) button. Each subtask appears with:
• A checkbox to mark it complete — completed subtasks move to the COMPLETED section
• An edit icon (✏️) to rename or update the subtask
• A delete icon (🗑️) to remove it
• An assignee badge showing who it's assigned to (e.g. "Pavan", "Thiru")
The task's progress percentage (e.g. 33%, 50%) on the Gantt timeline updates automatically as subtasks are completed.
Milestones
Mark key deadlines, deliverables, and checkpoints on your timeline.
Add milestones to highlight key dates
Milestones appear as green diamond (◆) markers on the Gantt timeline, separate from task bars. They sit in their own Milestones row between the project bar and the tasks section. A badge (e.g. "1") next to the Milestones label shows how many milestones exist.
How to add a milestone:
1. With a project selected, find the Milestones row — it sits just below the project bar on the timeline.
2. Click the + (plus) button next to "Milestones" (tooltip: "Add Milestone").
3. The Add Milestone dialog opens with two fields: Name (e.g. "Sprint Review") and Date.
4. Fill in the name and pick a date, then click Add Milestone to save.
5. The milestone appears immediately as a green diamond on the timeline at the chosen date.
Use milestones for deadlines, go-live dates, review gates, or any key checkpoint your team needs to track.
Web Browser Access
Use Project Planner! without installing anything.
Open Project Planner! in your browser
No Teams installation required. Access Project Planner! directly from any web browser by visiting the link below and signing in with your Microsoft account.
- Click the link to open the app: project-planner.infigen.ai/app
- Click "Sign in with Microsoft" and use your Microsoft organisational account to log in.
- Once signed in, you're ready to create projects and tasks — the same experience as inside Teams.
🌐 Project Planner! Web
Works in any modern browser — no install needed
Open Web App →
 Project Planner!
← Back to Home
Project Planner!
← Back to Home